Molds in Blister Packaging Product Production
By Mary Lyn. Last updated: June 8th, 2023
There’s no doubt that vacuum-formed or thermoformed blister packaging is the go-to option for a reason. And guess what? You’re about to learn all about it! This incredible process is all about customized molds and tools that make a blister product that is simply brilliant. Thanks to this post, you’re going to find out everything you need to know about creating amazing blister packaging products. So, let’s dive in and get started on this exciting journey!
Table of Contents
What kind of molds and tools will be used?
Molds are used to produce vacuum-formed products. The lowest cost one is made of plaster, followed by copper molds and aluminum molds. Small holes are drilled on the molds to facilitate the vacuum adsorption of the heated hard plastic films, forming blister products.
Apart from the molds mentioned above, there are other molds and tooling involved, such as Pin Ban, Base Mold, Upper Mold, Die-cutting Knife and Punching Tools.
Keep reading and you will learn more about each and every one of them.
Plaster Mold
What is Plaster Mold?
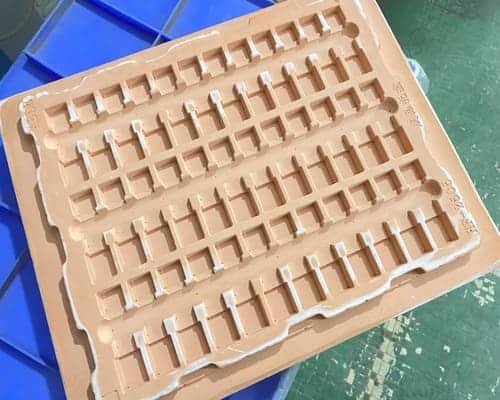
As the name suggested, plaster molds are made of plaster. They are generally used for creating simple or low-volume packaging, due to their relative fragility and short lifespan compared to other mold materials such as copper or aluminum. However, plaster molds are easy and inexpensive to make, making them a popular choice for prototyping and small-scale production runs.
What are the advantages and disadvantages of Plaster Molds?
Advantages
- Easy mold-making process;
- Short production cycle (2-4 days);
- Low cost & easy to modify.
Disadvantages
- Poor precision & rough surface;
- Short lifespan. Can be easily damaged, difficult to store, and not durable;
- Products produced from plaster molds would have poor transparency.
When should we use Plaster Molds?
It is mainly suitable for producing a small number of samples and products with low transparency requirements. If the customer demands a small amount of the product, or has low quality requirements and simple structure, plaster molds can also be used for production.
How to make a Plaster Mold?
The first step is to create a prototype of the desired design using physical objects or computer-aided design (CAD) software. The design should be precise and accurate as it will determine the shape and size of the finished product.
There are 2 ways to engrave a mold.
- For simple shaped or creative shaped packaging: Clients provide design drawings or have our engineers draw up a design. The design is then etched or engraved onto a plaster block using a laser machine. It is hand-crafted and machined to the exact shape and size of the desired mold. This process creates a recessed pattern on the surface of the plaster mold to match the desired shape of the final product.
- For custom-shaped packaging: Clients need to provide us with actual physical samples. With the sample products, the contour of the mold needs to be hand-crafted using modeling clay, and then vacuum-formed into a vacuum shell. After that, a plaster mold is replicated from the vacuum shell, and finally, the mold needs to be modified according to the drawing data and requirements before it can be used for production.
The surface of the mold is then polished to a comparatively smooth finish before being used to make samples or mass produce low volume simple blister packaging products.
What can be used as an alternative to Plaster Molds?
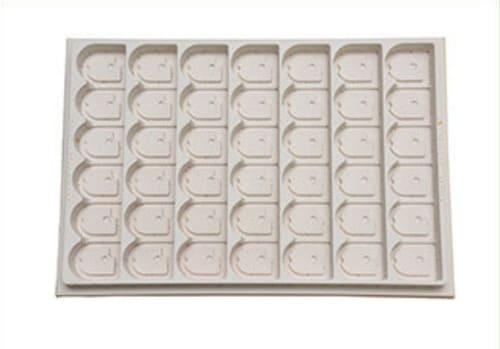
Apart from plaster molds, some manufacturers also use modeling boards to make molds for producing samples. They are also called Epoxy Tooling Boards or Polyurethane Tooling Boards.
Modeling board has excellent strength, plasticity and toughness. And it is also easy to cut, carve and resistant to deformation. It can be applied to CNC machining and can be used to produce various types of molds, models and tools, shortening the CNC machining cycle, reducing production costs, and improving productivity.
Copper Mold
What is Copper Mold?
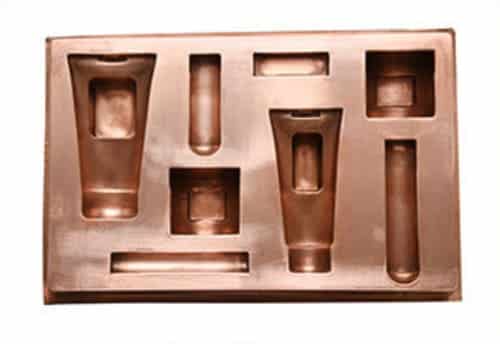
Copper mold is a crucial component in the blister packaging industry for manufacturing blister products. Unlike plaster mold, it is a more common and popular choice when it comes to mass production. It is also important to note that copper mold making is a complex process and requires skilled professionals and specialized equipment to ensure the final product is of the highest quality. You will find below the general steps involved in making copper molds.
What are the advantages and drawbacks of Copper Molds?
Advantages
- Moderate durability and cost;
- Products produced using copper molds have better appearance and transparency.
Drawbacks
- Longer production cycle (5-7 days);
- Higher cost than plaster molds;
- Unable to produce fine blister products for the lack of details, in which case aluminum molds is the key to fixing this issue.
When should we use copper molds?
While the cost of copper mold making is higher relative to plaster molds, but its use is more widespread, making it the preferred mold for most situations. Copper molds can be used for mass production of most simple-design blister packaging products.
How to make a Copper Mold?
- The first step involves Designing & Engraving like the plaster mold production process above. Before making a copper mold, we will need to make plaster molds. The design is to be engraved onto the plaster.
- Samples produced from plaster molds will be sent to customers for confirmation before mass production. Only when clients approve of the samples will plaster molds be coated with copper as the next step shows.
The surface of the plaster mold is then electroplated with copper to enhance the durability and impact resistance of the mold. This process takes about 72 hours. The copper layer also makes the mold more resistant to corrosion.
Drill some air holes or air vents on the molds.
The surface of the copper mold is then polished to a mirror-like finish to eliminate any surface defects or irregularities.
Finally, the mold is inspected, and any remaining burrs or rough edges are removed before being used to mass produce blister packaging products.
Here is a video showing the copper mold manufacturing process.
Aluminum Mold
What is Aluminum Mold?
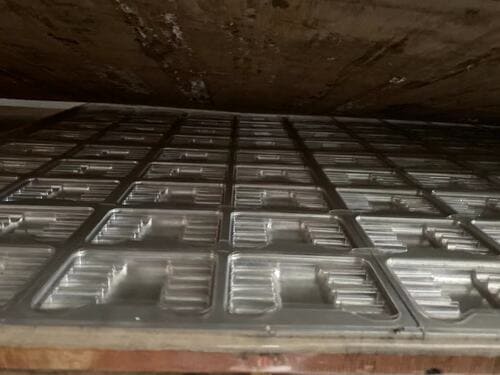
Aluminum molds are used for mass production of blister products just like copper molds. However, they are coated with aluminum instead of copper and are significantly more expensive than copper molds, almost 10 times over to be exact.
And to be fair, it’s worth every penny. Blister products manufactured using aluminum molds are more precise and have better quality with fewer scraps. Therefore, fewer defects can be expected and overall production costs can be reduced.
What are the advantages and disadvantages of Aluminum Molds?
Advantages
- Moderate production cycle (3-5 days);
- High durability and high degree of precision;
- Can produce products with very good appearance and transparency;
- Able to yield more aesthetically pleasing contours and detailed blister products.
Disadvantages
- Very high cost.
When should we use Aluminum Molds?
Considering the high price of aluminum molds and the complexity of the manufacturing process, manufacturers tend to use aluminum molds when the products require a high level of precision and attention to details to ensure that the final product meets the required specifications and quality standards. And large volume orders are expected.
How to make an Aluminum Mold?
A custom plaster mold will be created using CAD technology based on product specifications and requirements. And samples made from the plaster mold will be sent to clients for confirmation before making an aluminum mold for mass production.
The mold design is then translated into a 3D model, which is then used by a CNC machine to cut the mold out of a block of aluminum. This process can take several hours to complete, depending on the complexity of the mold.
Once the mold has been cut, it needs to be finished. This involves smoothing out any rough surfaces and creating any necessary features or details, such as air holes and snap-shut buttons, on the mold. This step can be done manually or using a CNC machine. Afterwards the mold is polished and smoothed before being put into use. Teflon or sandblasting will be applied to the mold if situation requires.
After the mold has been finished, it is tested to ensure that it is working correctly. This involves using the mold to create sample blister packs or prototypes. Any necessary adjustments or modifications are made at this stage.
Once the mold has been approved, it can be used for mass production of blister packaging products. The mold is loaded onto a machine that heats the plastic material and molds it into the desired shape using vacuum pressure.
Pin Ban, Base Mold & Upper Mold
What is Pin Ban and why is it necessary?

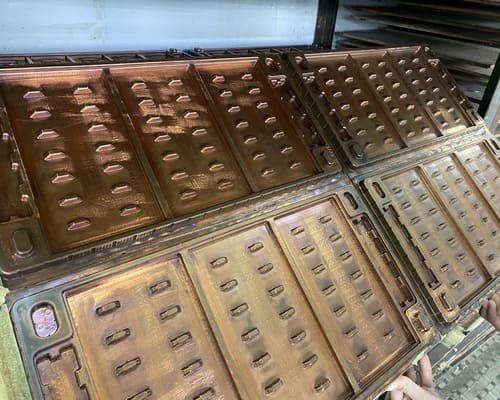
The photo shows a copper mold version of Pin Ban.
Similar to prepress imposition used in the printing process, the blister packaging industry also involves a critical step known as ‘Pin Ban’ (Chinese name ‘拼版’). This involves arranging customized molds onto a board to optimize thermoforming speed, facilitate cutting, and minimize plastic waste.
Effective Pin Ban reduces production time and costs by maximizing the number of blister packs per impression. To achieve this, the board must be filled to the brim with molds. This typically involves combining 6 to 8 molds onto a single wooden board, depending on the size of the products being produced.
What is Base Mold and Upper Mold?
In order to explain to readers what a Base Mold is, we have to mention Pin Ban again.
Due to the limited forming range of approximately 66x110cm on the vacuum forming machines, whether using plaster, copper, or aluminum molds, it is necessary to combine individual molds to achieve the forming size. This process, as you may have known by now, is commonly referred to as ‘Pin Ban’, which involves assembling the molds onto perforated wooden boards.
After the molds are assembled, the entire board of molds is referred to as the ‘Base Mold’. Apart from the Base Molds, Upper Molds also need to be made. They are tools made of wood in order to keep the plastic sheets in place during the thermoforming process.
While plastic sheet is thermoformed into shape on the Base Mold, pressure is applied from above the sheet to uniformly stretch the sheet to avoid uneven thickness in certain areas.
Die-cutting Knife & Punching Tools
These two tools are primarily used for cutting edges and piercing holes, such as round holes and euro holes, during cutting and punching operations.
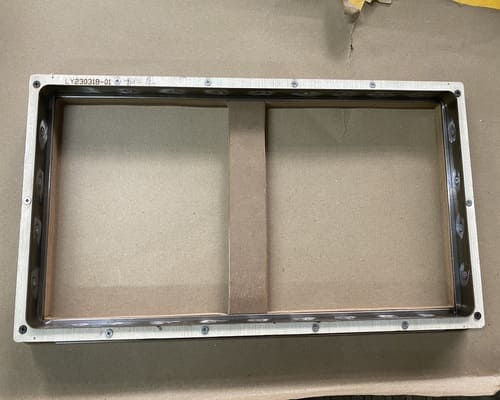
Die-cutting Knife
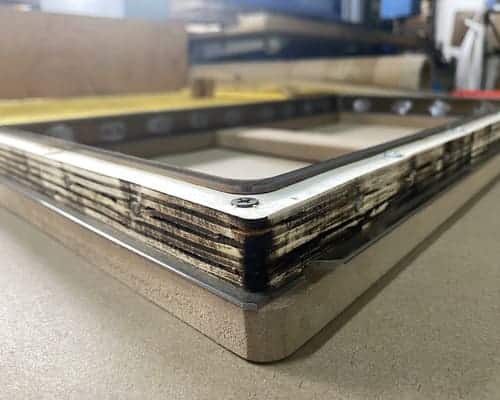
Close-up: Round Corner Cutter
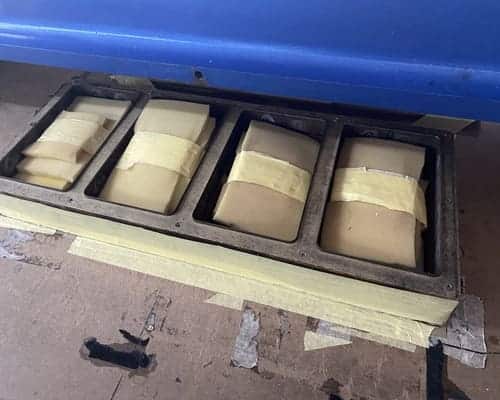
Die-cutting Cushion Padding
Conclusion
In thermoformed blister packaging production, quite a few tools are required to make custom packaging products. In a nut shell, plaster molds are the most economical option, followed by electroplated copper molds, while aluminum molds are the most expensive. Price aside, each can create products that cater to different clients’ needs and standards.